Recently a friend of mine was looking for me to throw together a quick sample of Entity Framework. I thought it would be a good time to introduce him into domain-driven design (DDD) as well as using Dino a great ORM wrapper framework a friend of mine recently built. I will walk you through my simple solution I built him.
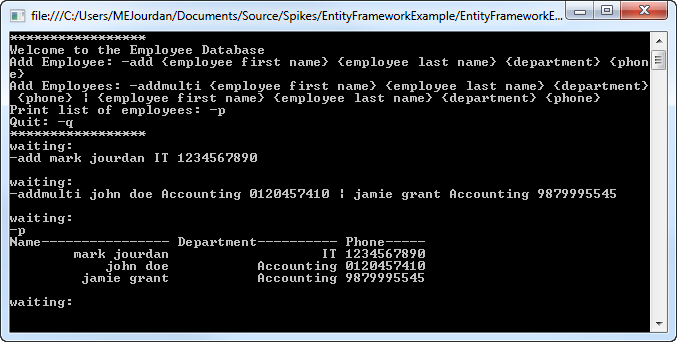
I decided to build a simple console application since it removes the dependency on focusing on the visual design. This application will simply allow you to add employees to a database using the –add command and display the employees to the screen using the –p command. The application will continue to run until the user wants to exit using the –q command.
Solution Code
Entity Framework 4.3 with Dino
Core Technology:
- .NET 4.0 C#
- Domain-Driven Design Principals
- Dino– ORM wrapper framework (Unit of Work)
- Entity Framework 4.3.1
- SQL Server Compact
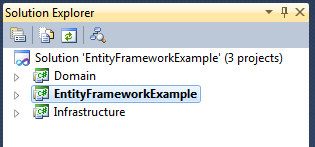
I start out by creating a new solution and within the solution I have 3 projects: application layer, domain layer and infrastructure layer.
Once I have my solution setup I begin with the Domain. The domain will contain any knowledge, influence or activity that relates to the application. For this example our domain will host 2 pieces of knowledge, it will contain our entity object and an interface with the knowledge of what our repository does.
I will start by adding an Employee entity. I’m going to keep it simple, it will have an ID, Name, Department and Phone property because I’m only going to want to store those fields in the database.
namespace Domain.Entities
{
    public class Employee
    {
        public long EmployeeId { get; set; }
        public string Name { get; set; }
        public string Department { get; set; }
        public string Phone { get; set; }
    }
}
I'm going to take the time and also setup my repository interface. I will need my repository to have some basic functionality add an employee, add multiple employee's, get a list of all employees and return a single employee. Here is what my interface will look like.
using System.Linq;
using Domain.Entities;

namespace Domain.Repositories
{
	public interface IExampleRepository
	{
		void AddEmployee(Employee employee);
		void AddEmployees(IEnumerable employees);
		IQueryable<Employee> GetEmployees();
		Employee GetEmployee(long employeeId);
	}
}
Now that our domain is complete I will build out our infrastructure. In DDD the infrastructure layer is responsible for managing all infrastructure resources such as databases, communicating with other frameworks and other applications.
The the primary responsibility for our infrastructure will be to talk to our database. For this application I will need to wire up Entity Framework code first with SQL and create the repository that will retrieve/store (repositories don’t create entities/data, leave that to factories)/delete data from the database. Let’s start by wiring up Entity Framework.
I begin by creating the employee configuration using Entity Frameworks code first’s entity type configuration. I’ll make the EmployeeId filed the key for the table and call the table Employee
using System.ComponentModel.DataAnnotations;
using System.Data.Entity.ModelConfiguration;
using Domain.Entities;

namespace Infrastructure.Data.Configurations
{
    public class EmployeeConfiguration : EntityTypeConfiguration<Employee>
    {
        public EmployeeConfiguration()
        {
            HasKey(p => p.EmployeeId);
            Property(p => p.EmployeeId).IsRequired().HasDatabaseGeneratedOption(DatabaseGeneratedOption.Identity);
            Property(p => p.Name);
            Property(p => p.Phone);
            Property(p => p.Department).IsRequired();
            ToTable("Employee");
        }
    }
}
Next we will create the ObjectContext, Dino makes this easy for us, the wrapper already has an Entity Framework implementation setup for us and we just need to inherit off of the IObjectContext. We now just have to implement the add, delete, query and commit methods. We will create a connection string constant which will be used later in our configuration file. We will also want to wire up the entity type configuration when the model is created, this is for allowing Entity Framework code first to create the database for us if it doesn’t exist.
using System.Data.Entity;
using System.Linq;
using Dino;
using Infrastructure.Data.Configurations;

namespace Infrastructure.Data
{
	public class EfExampleReviewContext : DbContext, IObjectContext
	{
		public const string ConnectionString = "name=EfExampleReviewContext";

		public EfExampleReviewContext() : base(ConnectionString)
		{
				Configuration.LazyLoadingEnabled = true;
		}

		public EfExampleReviewContext(string connectionString): base(connectionString)
		{
				Configuration.LazyLoadingEnabled = true;
		}

		protected override void OnModelCreating(DbModelBuilder modelBuilder)
		{
				modelBuilder.Configurations.Add(new EmployeeConfiguration());
				base.OnModelCreating(modelBuilder);
		}

		#region Implementation of IObjectContext

		public void Commit()
		{
				SaveChanges();
		}

		public IQueryable<T> Query<T>() where T : class
		{
				return Set<T>().AsQueryable();
		}

		public void Add<T>(T entity) where T : class
		{
				Set<T>().Add(entity);
		}

		public void Delete<T>(T entity) where T : class
		{
				Set<T>().Remove(entity);
		}

		#endregion
	}
}
Now its time to create our repository. In this example we make the repository really simple. Were just going to need to inherit off of our repository interface we created in our Domain and implement each of the methods.
Since we are using Dino we just need to pass into the constructor our ObjectContext and let Dino manage our unit of work.
using System.Collections.Generic;
using System.Linq;
using Dino;
using Domain.Entities;
using Domain.Repositories;

namespace Infrastructure.Repositories
{
	public class ExampleRepository : IExampleRepository
	{
		readonly IObjectContext _contextProvider;

		public ExampleRepository(IObjectContext contextProvider)
		{
			_contextProvider = contextProvider;
		}

		public void AddEmployee(Employee employee)
		{
			_contextProvider.Add(employee);
		}

		public void AddEmployees(IEnumerable<Employee> employees)
		{
			foreach (var employee in employees)
			{
				_contextProvider.Add(employee);
			}
		}

		public IQueryable<Employee> GetEmployees()
		{
			return _contextProvider.Query<Employee>();
		}

		public Employee GetEmployee(long employeeId)
		{
			return _contextProvider.Query<Employee>().SingleOrDefault(e => e.EmployeeId == employeeId);
		}
	}
}
Our Infrastructure is complete so now we can move onto our final layer, the console application. This layer will only contain logic that is specific to its technology (WPF/Console/Web). In my example I chose to just implement a console application.
We will first implement our applications Main() method. First we will do the basic wire up, which is really wiring up Dino and setting up the repository and unit of work we will need later. We will create a new unit of work inside of Dino, add our ObjectContext to the unit of work and finally set the repository and session properties on the page.
public static IExampleRepository ExampleRepository { get; set; }
public static ISession Session { get; set; }
static void Main()
{
	Setup();
}

private static void Setup()
{
	var uow = new UnitOfWork();
	uow.Add<EfExampleReviewContext>(() => new EfExampleReviewContext());
	ExampleRepository = new ExampleRepository(uow.GetContext<EfExampleReviewContext>());
	Session = uow;
}
We will display to the user some simple instructions on what we allow the user the ability to do. Next we will wait for the users input. Notice we do most of our communication with our repository.
using System;
using System.Linq;
using Dino;
using Domain.Entities;
using Domain.Repositories;
using Infrastructure.Data;
using Infrastructure.Repositories;

namespace EntityFrameworkExample
{
	public class ExampleApplication
	{
		public static IExampleRepository ExampleRepository { get; set; }
		public static ISession Session { get; set; }

		static void Main()
		{
			Setup();
			Console.WriteLine("*****************");
			Console.WriteLine("Welcome to the Employee Database");
			Console.WriteLine("Add Employee: -add {employee first name} {employee last name} {department} {phone}");
			Console.WriteLine("Add Employees: -addmulti {employee first name} {employee last name} {department} {phone} | {employee first name} {employee last name} {department} {phone}");
			Console.WriteLine("Print list of employees: -p");
			Console.WriteLine("Quit: -q");
			Console.WriteLine("*****************");

			ReadLine();
		}

		...

		private static void ReadLine()
		{
			var continueRunning = true;

			Console.WriteLine("waiting:");
			Console.Out.Flush();
			var inputStr = Console.ReadLine();

			if (inputStr != null)
			{
				var inputStrArray = inputStr.Split(new[] { ' ' });

				switch (inputStrArray.First())
				{
					case "-add":
						if (inputStrArray.Count() != 5)
						{
							Console.WriteLine("Not in the proper format, I expect '{{employee first name}} {{employee last name}} {{department}} {{phone}}' you provided '{0}'", inputStr.Replace(inputStrArray.First(), ""));
							break;
						}

						var employeeName = inputStrArray.Skip(1).First() + " " + inputStrArray.Skip(2).First();
						var department = inputStrArray.Skip(3).First();
						var phone = inputStrArray.Skip(4).First();

						ExampleRepository.AddEmployee(new Employee
						{
							Department = department,
							Name = employeeName,
							Phone = phone
						});
						Session.Commit();
						break;
						case "-addmulti":
							if (inputStrArray.Count() != 10)
							{
								Console.WriteLine("Not in the proper format, I expect ''{{employee first name}} '{{employee last name}} '{{department}} '{{phone}} | '{{employee first name}} '{{employee last name}} '{{department}} '{{phone}}' you provided '{0}'", inputStr.Replace(inputStrArray.First(), ""));
								break;
							}
							var employeeName1 = inputStrArray.Skip(1).First() + " " + inputStrArray.Skip(2).First();
							var department1 = inputStrArray.Skip(3).First();
							var phone1 = inputStrArray.Skip(4).First();

							var employeeName2 = inputStrArray.Skip(6).First() + " " + inputStrArray.Skip(7).First();
							var department2 = inputStrArray.Skip(8).First();
							var phone2 = inputStrArray.Skip(9).First();

							ExampleRepository.AddEmployee(new Employee
							{
								Department = department1,
								Name = employeeName1,
								Phone = phone1
							});

							ExampleRepository.AddEmployee(new Employee
							{
								Department = department2,
								Name = employeeName2,
								Phone = phone2
							});

							Session.Commit();
							break;
						case "-p":
							var employees = ExampleRepository.GetEmployees();

							Console.WriteLine("Name---------------- Department---------- Phone-----");
							foreach (var employee in employees)
							{
								Console.WriteLine("{0} {1} {2}", employee.Name.PadLeft(20, ' ').Substring(0, 20), employee.Department.PadLeft(20, ' ').Substring(0, 20), employee.Phone.PadLeft(10, ' ').Substring(0, 10));
							}
							break;
						case "-q":
							Console.WriteLine("Now Exiting");
							continueRunning = false;
							break;
						default:
							Console.WriteLine("Unrecognized command '{0}'", inputStr);
							break;
						}
					}
			Console.WriteLine("");

			if(continueRunning) ReadLine();
		}
	}
}
Now you may be asking what does the Unit of Work do for you. The unity of work will maintain a list of objects that need to be committed through a single transaction. In this example the only benefit we get is during the “add multi” command. We are adding 2 users through 1 transactional commit to the database.
ExampleRepository.AddEmployee(new Employee
	{
		Department = department1,
		Name = employeeName1,
		Phone = phone1
	});

ExampleRepository.AddEmployee(new Employee
	{
		Department = department2,
		Name = employeeName2,
		Phone = phone2
	});
Session.Commit();
The final piece before running the application is to wire up the database in the configuration file. I chose to use SQL Server Compact 4.0 in this example since it is easy to use and I don’t need to run this on a full instance of SQL Server and just need to install a small footprint installer on the computer. I will just need to add the connection string using the name of the context
<?xml version="1.0" encoding="utf-8"?>
<configuration>
  <connectionStrings>
    <add name="EfExampleReviewContext" connectionString="Data Source=|DataDirectory|\EntityFrameworkExample.sdf;" providerName="System.Data.SqlServerCe.4.0" />
  </connectionStrings>
</configuration>
Screenshot
Conclusion
Now that I have walked you through the application I hope you get a better understanding of a simple application using Entity Framework 4.3 with Dino in a Domain-Driven application. Feel free to download and play with the solution.